How to Use a Seed Starter Kit with USB and LED Lights
Using a seed starter kit with USB and LED lights is a great way to get a head start on your gardening season. Here’s a detailed, step-by-step guide to help you get the most out of your kit:
Gather Your Supplies
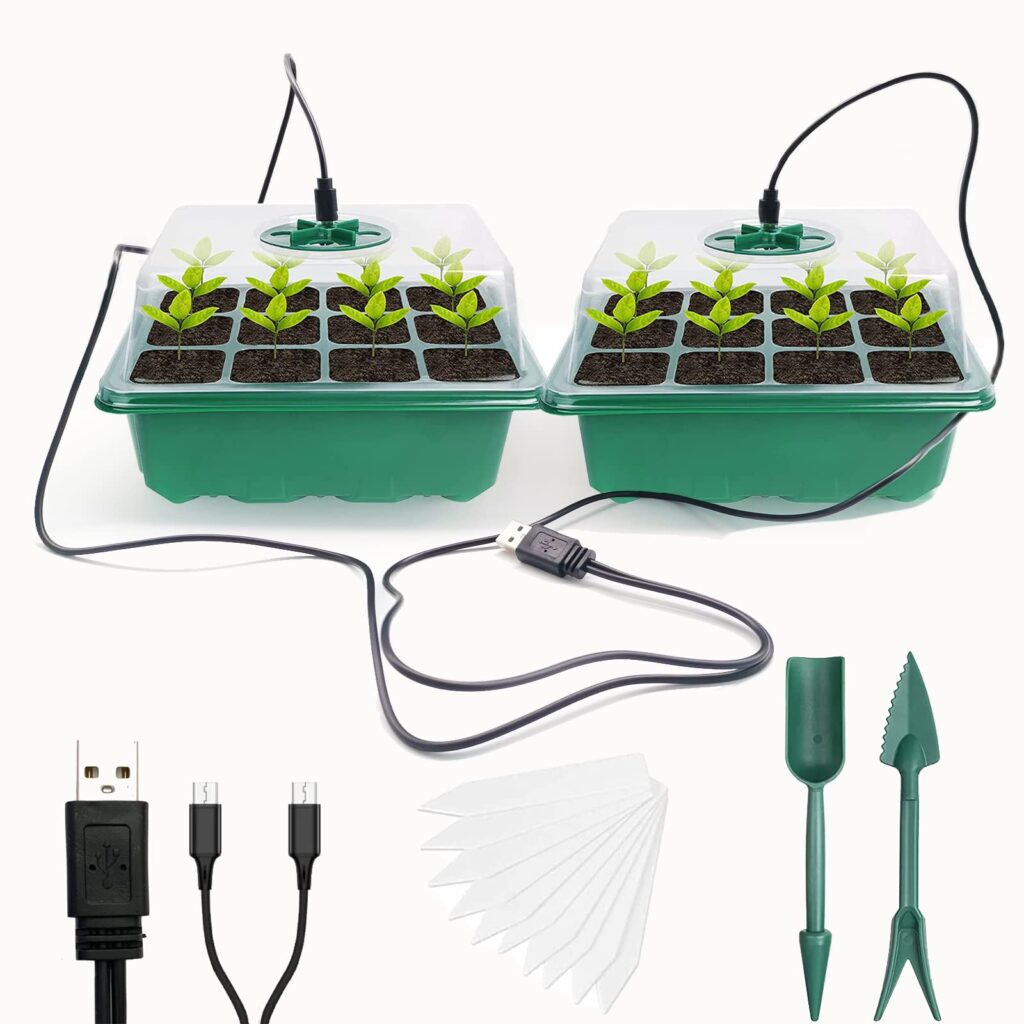
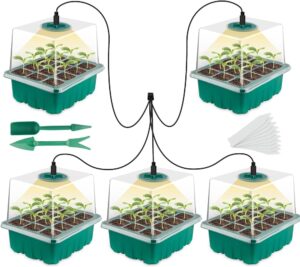
- Seed starter kit with USB and LED lights: This typically includes a seed tray with individual cells, a LED light unit, and a USB power cable.
- Potting mix or seed starting mix: Use a high-quality, sterile potting mix or seed starting mix to provide the necessary nutrients and drainage for your seedlings.
- Seeds of your choice: Select the seeds you want to grow, making sure they are suitable for your climate and growing conditions.
- Water spray bottle: This will be used to mist the soil and keep it consistently moist.
- Scissors or pruners (optional): These may be used later to thin out overcrowded seedlings.
Prepare the Seed Tray
- Inspect the Tray: Carefully inspect the seed tray to ensure it is clean and free of any debris or residue from previous use. This will help prevent the introduction of pests or diseases.
- Fill the Tray: Gently fill each individual cell in the seed tray with the potting mix or seed starting mix, leaving a small gap of about 1/4 inch at the top of each cell.
Check the pH potting mix or seed starting mix
- Water the potting mix: Pour water into the seed tray and moisten your growing medium.
- Check the pH of the potting mix: Take the pH test paper or a pH meter and put it in the wet potting mix and check if its pH is neutral, acidic or alkaline.
- Ideal pH for starting seed tray is 5.5-7.
Plant the Seeds:
- Plant the Seeds: Using your finger or a pencil, make a small indent in the soil of each cell, about 1/4 to 1/2 inch deep. Carefully place the seeds in each cell and gently cover them with soil, pressing lightly to ensure good seed-to-soil contact.
- Label the Cells: Use a permanent marker or small labels to identify the different types of seeds in each cell. This will help you keep track of your plantings.
- Mist the Soil: Lightly mist the soil in each cell with the water spray bottle, being careful not to displace the seeds or compact the soil.
Set Up the Lighting
- Connect the USB Lights: Locate the USB cable attached to the LED light unit and plug it into a power source, such as a USB wall adapter or a computer USB port.
- Position the Lights: Place the LED light unit above the seed tray, adjusting the height as needed to ensure the lights are about 2-4 inches above the soil surface. This distance may need to be adjusted as the seedlings grow.
- Turn on the Lights: Switch on the LED lights, and ensure they are providing even coverage across the entire seed tray. The lights should be on for 12-16 hours per day to provide the necessary light for seed germination and seedling growth.
Monitor and Care for the Seedlings
- Check Soil Moisture: Regularly check the soil moisture by lightly touching the surface. If the soil feels dry, mist it lightly with the water spray bottle to keep it consistently moist, but avoid overwatering.
- Adjust Light Height: As the seedlings grow, periodically check the distance between the LED lights and the soil surface, and adjust the height of the lights accordingly to maintain the 2-4 inch distance.
- Thin Out Seedlings: Once the seedlings have their first set of true leaves, use scissors or pruners to thin out any overcrowded or weaker seedlings. This will allow the remaining seedlings to have enough space and resources to grow strong and healthy.
- Harden Off Seedlings: Before transplanting the seedlings into your garden, gradually expose them to more sunlight and lower humidity over the course of 7–10 days. This “hardening off” process will help the seedlings adapt to the outdoor environment and reduce transplant shock.
By following these detailed steps, you can successfully use your seed starter kit with USB and LED lights to get a head start on your gardening season and enjoy a bountiful harvest.